
Overview - updated February 2026
This page has a full description of this section of the trail, including supporting photographs. You can read this page and/or
Starting point
The starting point is the northern car park at Cape Peron.
Getting there using public transport
The starting point is the northern car park at Cape Peron. There are no buses that go to Cape Peron, so you have to catch a taxi/Uber to the start.
Turn around point
The turn around point is a small carpark at the end of Boundary road, where it meets Ardadia Drive.
Getting back to the start from the turn around point – if you don’t want to do an out-and-back walk
It is not possible to get back to the starting point using public transport, as there is no buses servicing Cape Peron. A taxi/Uber is your only option.
Summary of the walk
Figure 1 below shows the suggested route in blue and an alternative return route is shown in yellow. TThe one-way distance is 4.6km and the return leg is 2.9km (taking the yellow option) making it a 7.5km out and back walk.
Water and toilets
NOTE: there are no toilets or drink fountains on this walk so come well prepared.
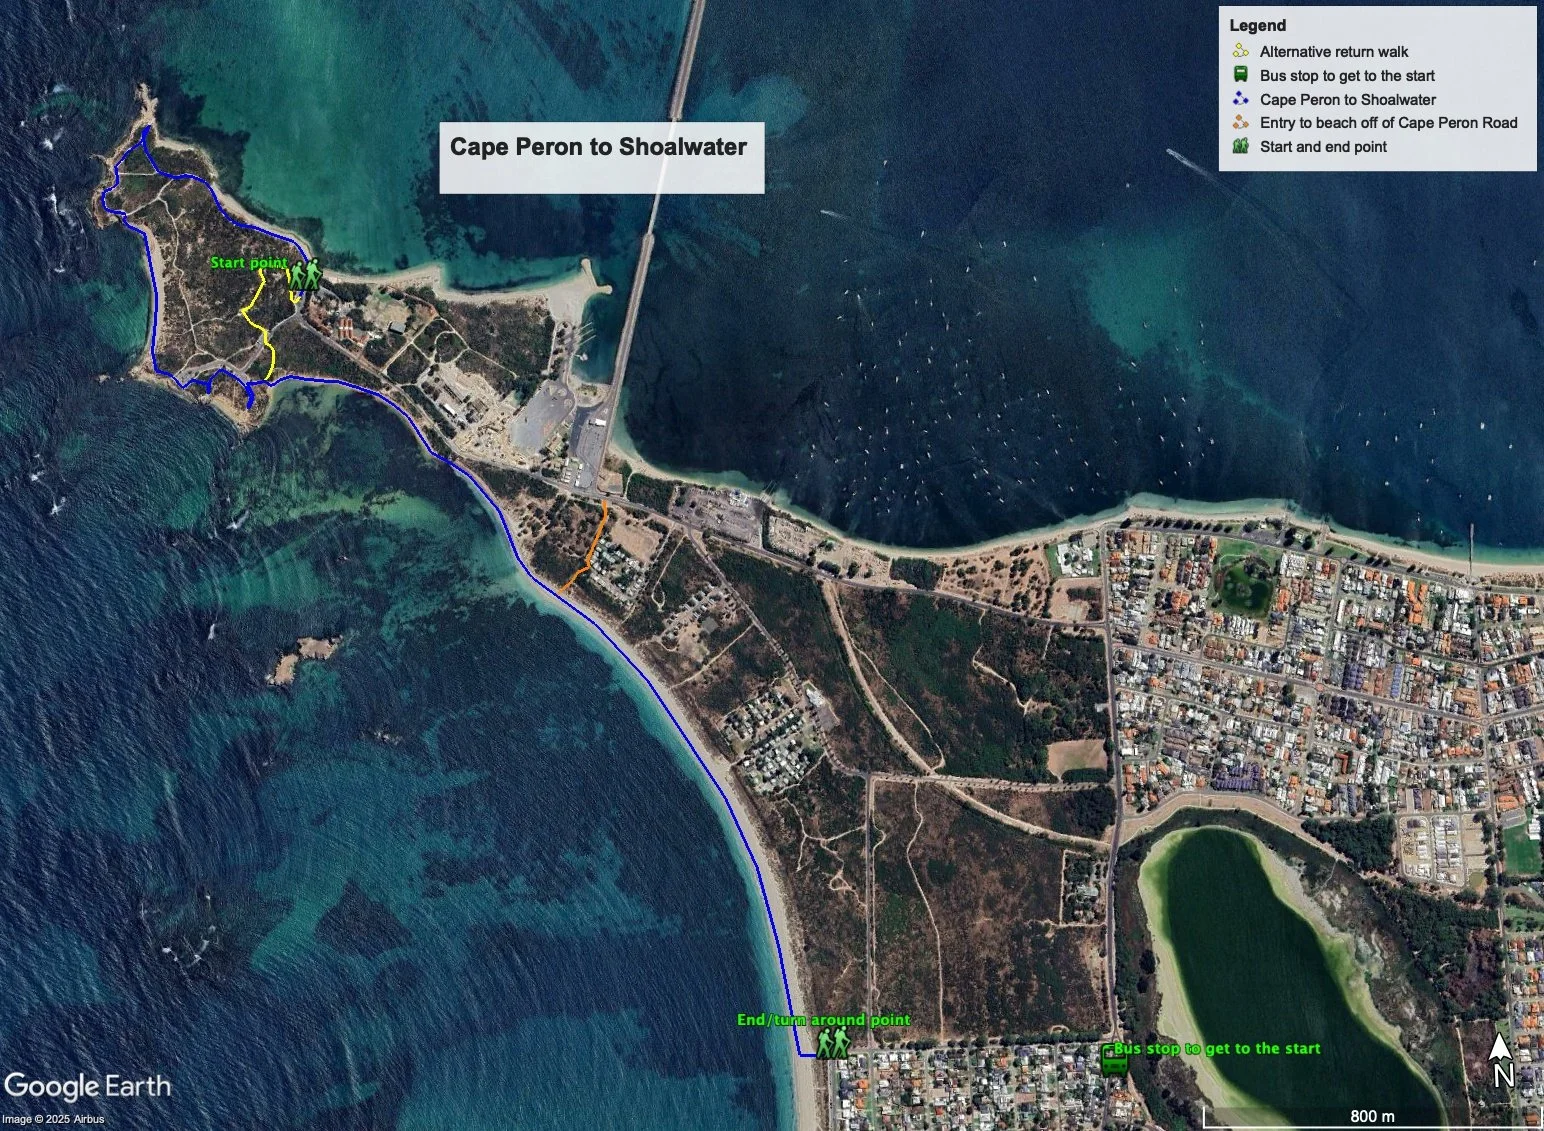
Figure 1 - the route
Information about Cape Peron
Cape Peron is part of the Rockingham Lakes Regional Park, and Figure 2 below shows the zoning map from the approved management plan for the area. You can download the management plan by clicking on this link - http://www.dpaw.wa.gov.au/images/documents/parks/management-plans/decarchive/rockingham_lakes_regional_park_management_plan__cover.pdf

Figure 2: Map showing Rockingham Lakes regional park and the various land use ‘zonings’.
The site for the proposed Mangles Bay Marina is shown in pink as an “area subject to further planning”.
Walking guide
The path starts from the NW corner of the carpark (Plate 1), and continue on this passed the turn around place of the last walk. The path changes from bitumen to re-formed limestone, and continue on this until the first junction (Plate 2). Take the right fork which goes to Cape John, the northern-most point of Cape Peron.

Plate 1: Start of the path at NW corner of carpark
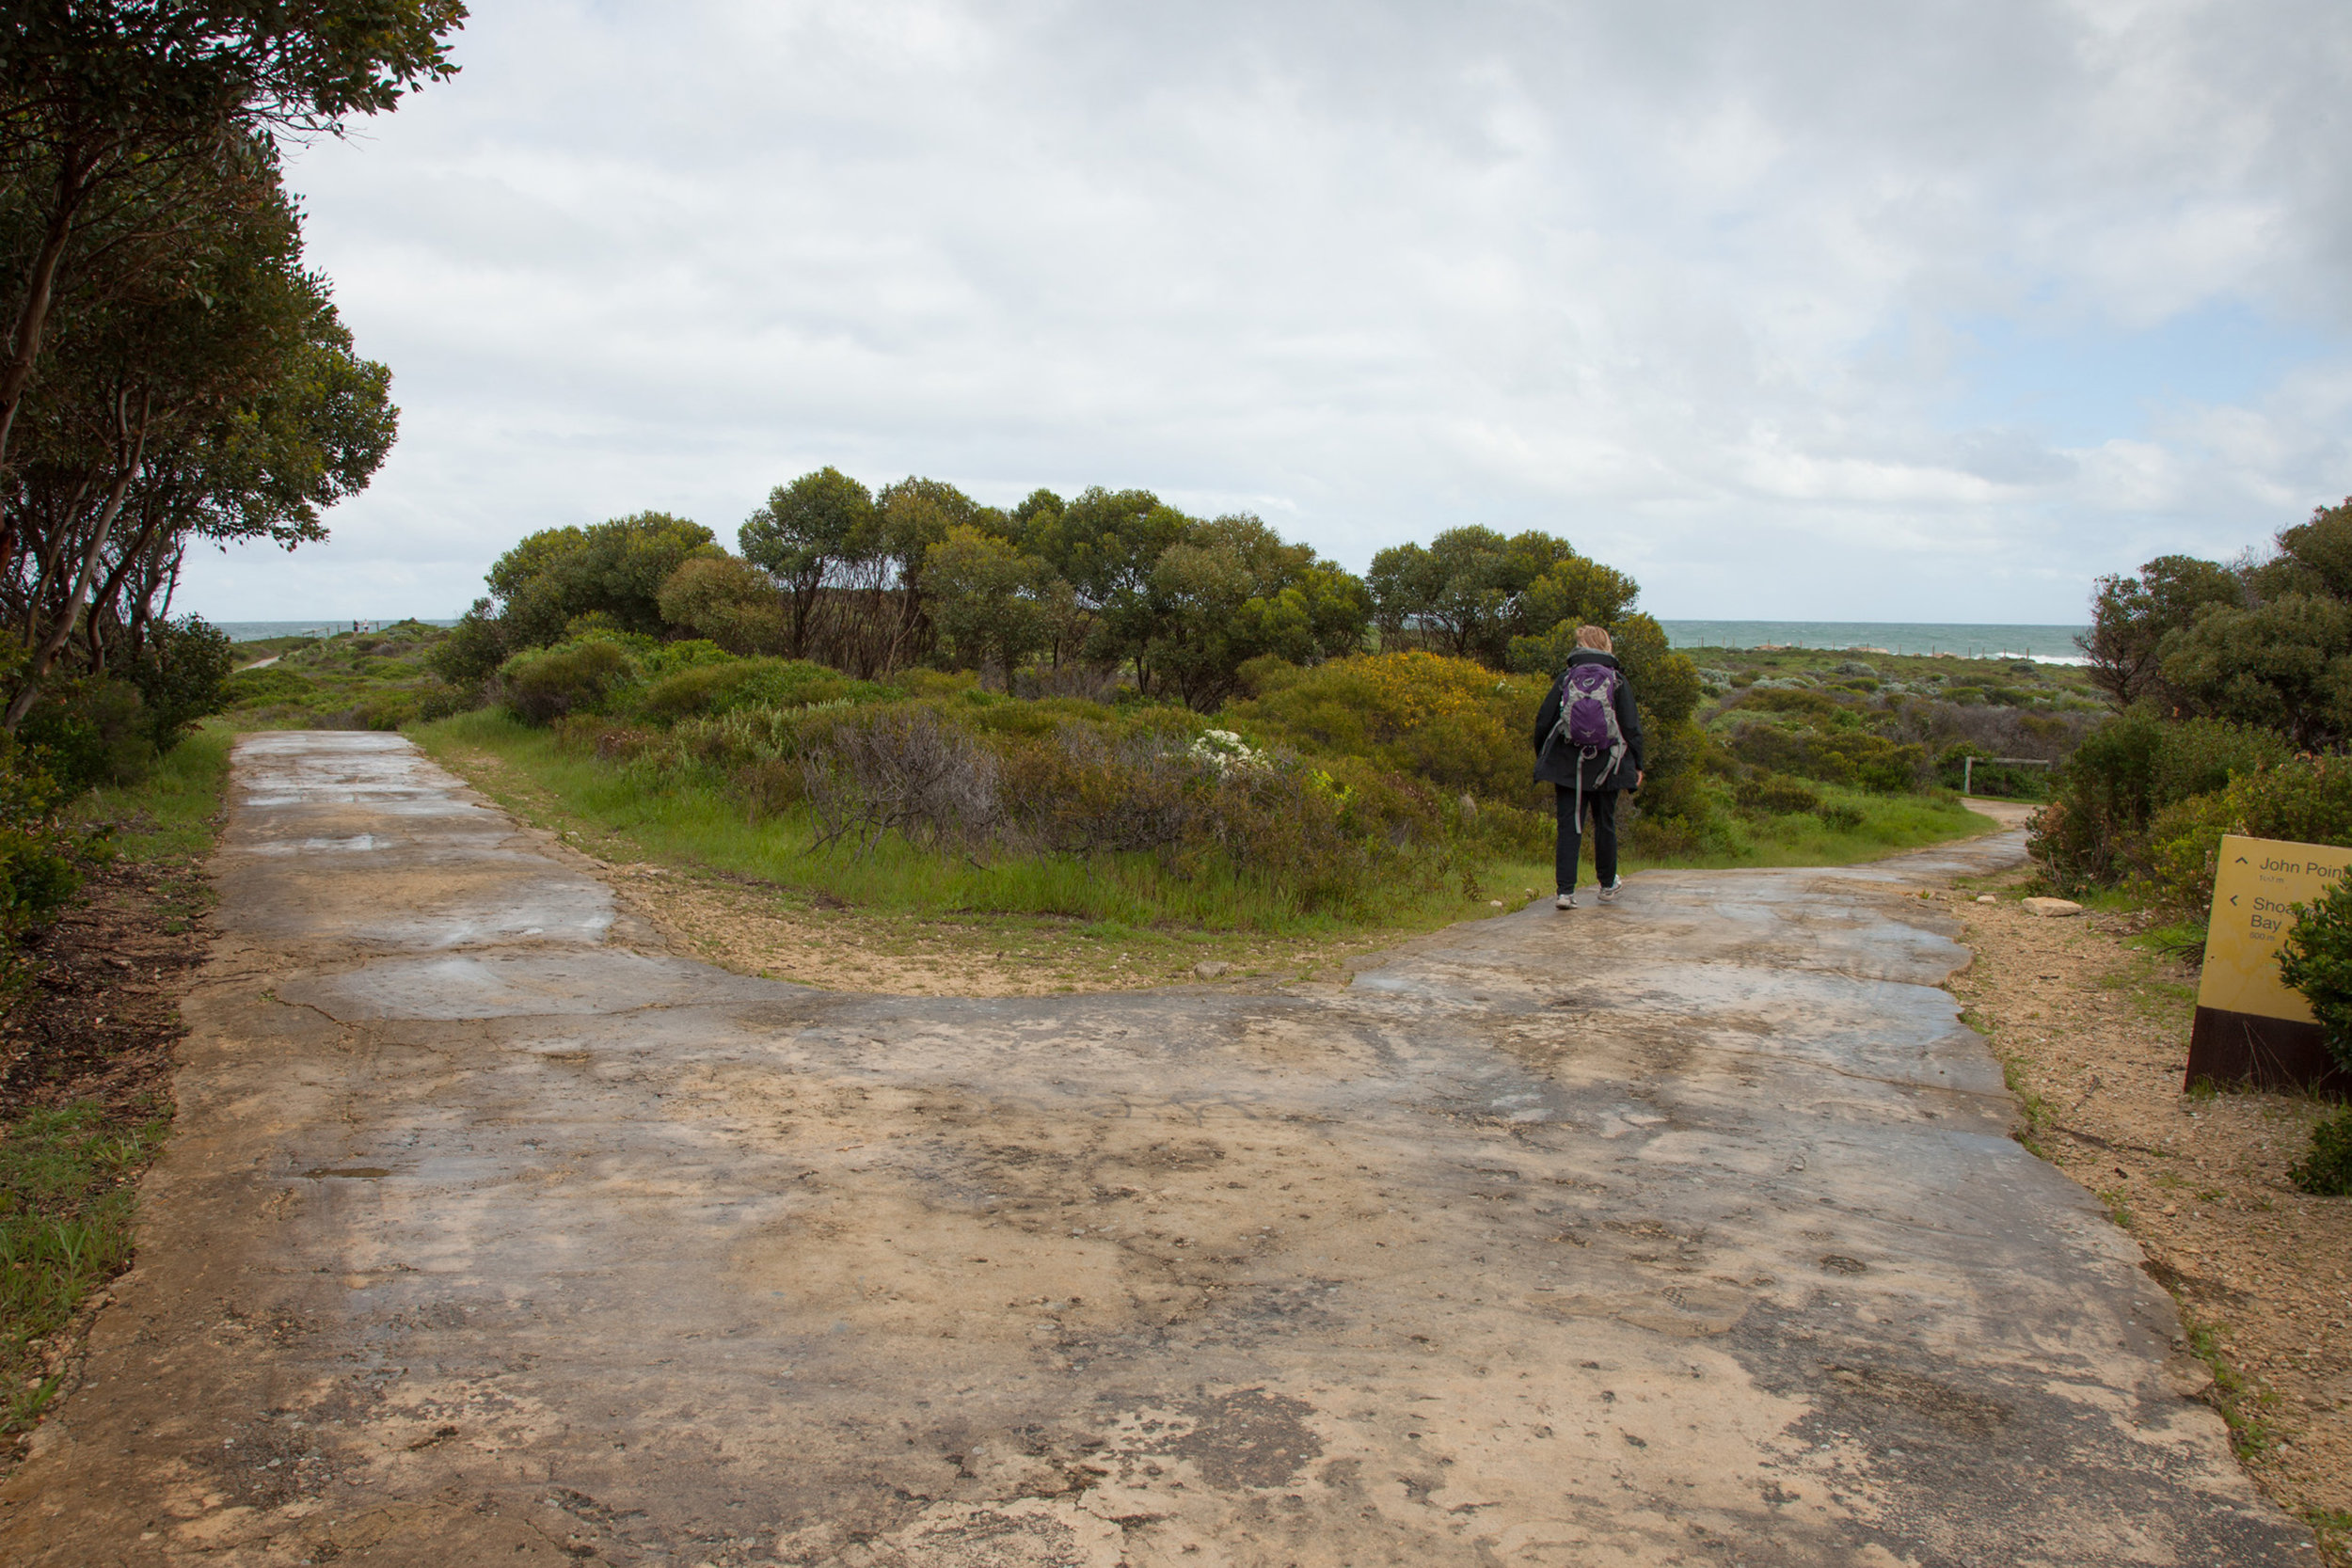
Plate 2: Track Junction – right form goes to Cape John
The views from Cape John are spectacular and well worth a visit (Plate 3).

Plate 3: View of Garden Island from Cape John
Head back to the track junction, and continue following the path south along the limestone cliffs that make up the coast here. There are a couple of small side tracks which will take you closer to the coast with equally spectacular views (Plate 4).

Plate 4: Coastal view from one of the small side tracks
Continue along this path, and take the path and steps that leads to a small beach (Plate 5). You could continue along the path if you wish.

Plate 5: Track to the right leading to the beach
At high tide, it could be tricky getting on to the beach as the waves wash over the rocks that you have to climb down to get to the beach. There is some erosion here, but the beach is generally wide enough to walk on. It’s worth noting that if you had stay on the path, you could have visit one of the two hill top look-outs in the area. There is as track at the end of the beach which goes through the dunes (Plate 6) and take this to the main southern car park at the Cape (Plate 7).

Plate 6: Track leading from the beach to join the circuit track

Plate 7: Track to the southern carpark showing the viewing platform and the paths that leads to it
As can be seen in Plate 7, there is a concrete path that lead to a viewing platform with more spectacular views, this time to the Islands and reef to the south, and Shoalwater (Plate 8). This is the northern boundary of the Shoalwater Islands Marine Park and Reserve – see next walk for more details.

Plate 8: View from the platform
From the viewing platform, head back down the path and head south through the carpark to the end (Plate 9). The path then forks to the right and left (Plate 10).

Plate 9: Heading to the southern end of the carpark

Plate 10: The path to the right leads to another lookout. Going left (where the walkers are going) is the start of the track to the beach
The path to the right which lead to another lookout (Plate 11) and the start of the Cape Peron snorkel trail (Plate 12).

Plate 11: Small viewing platform to the south of the main one
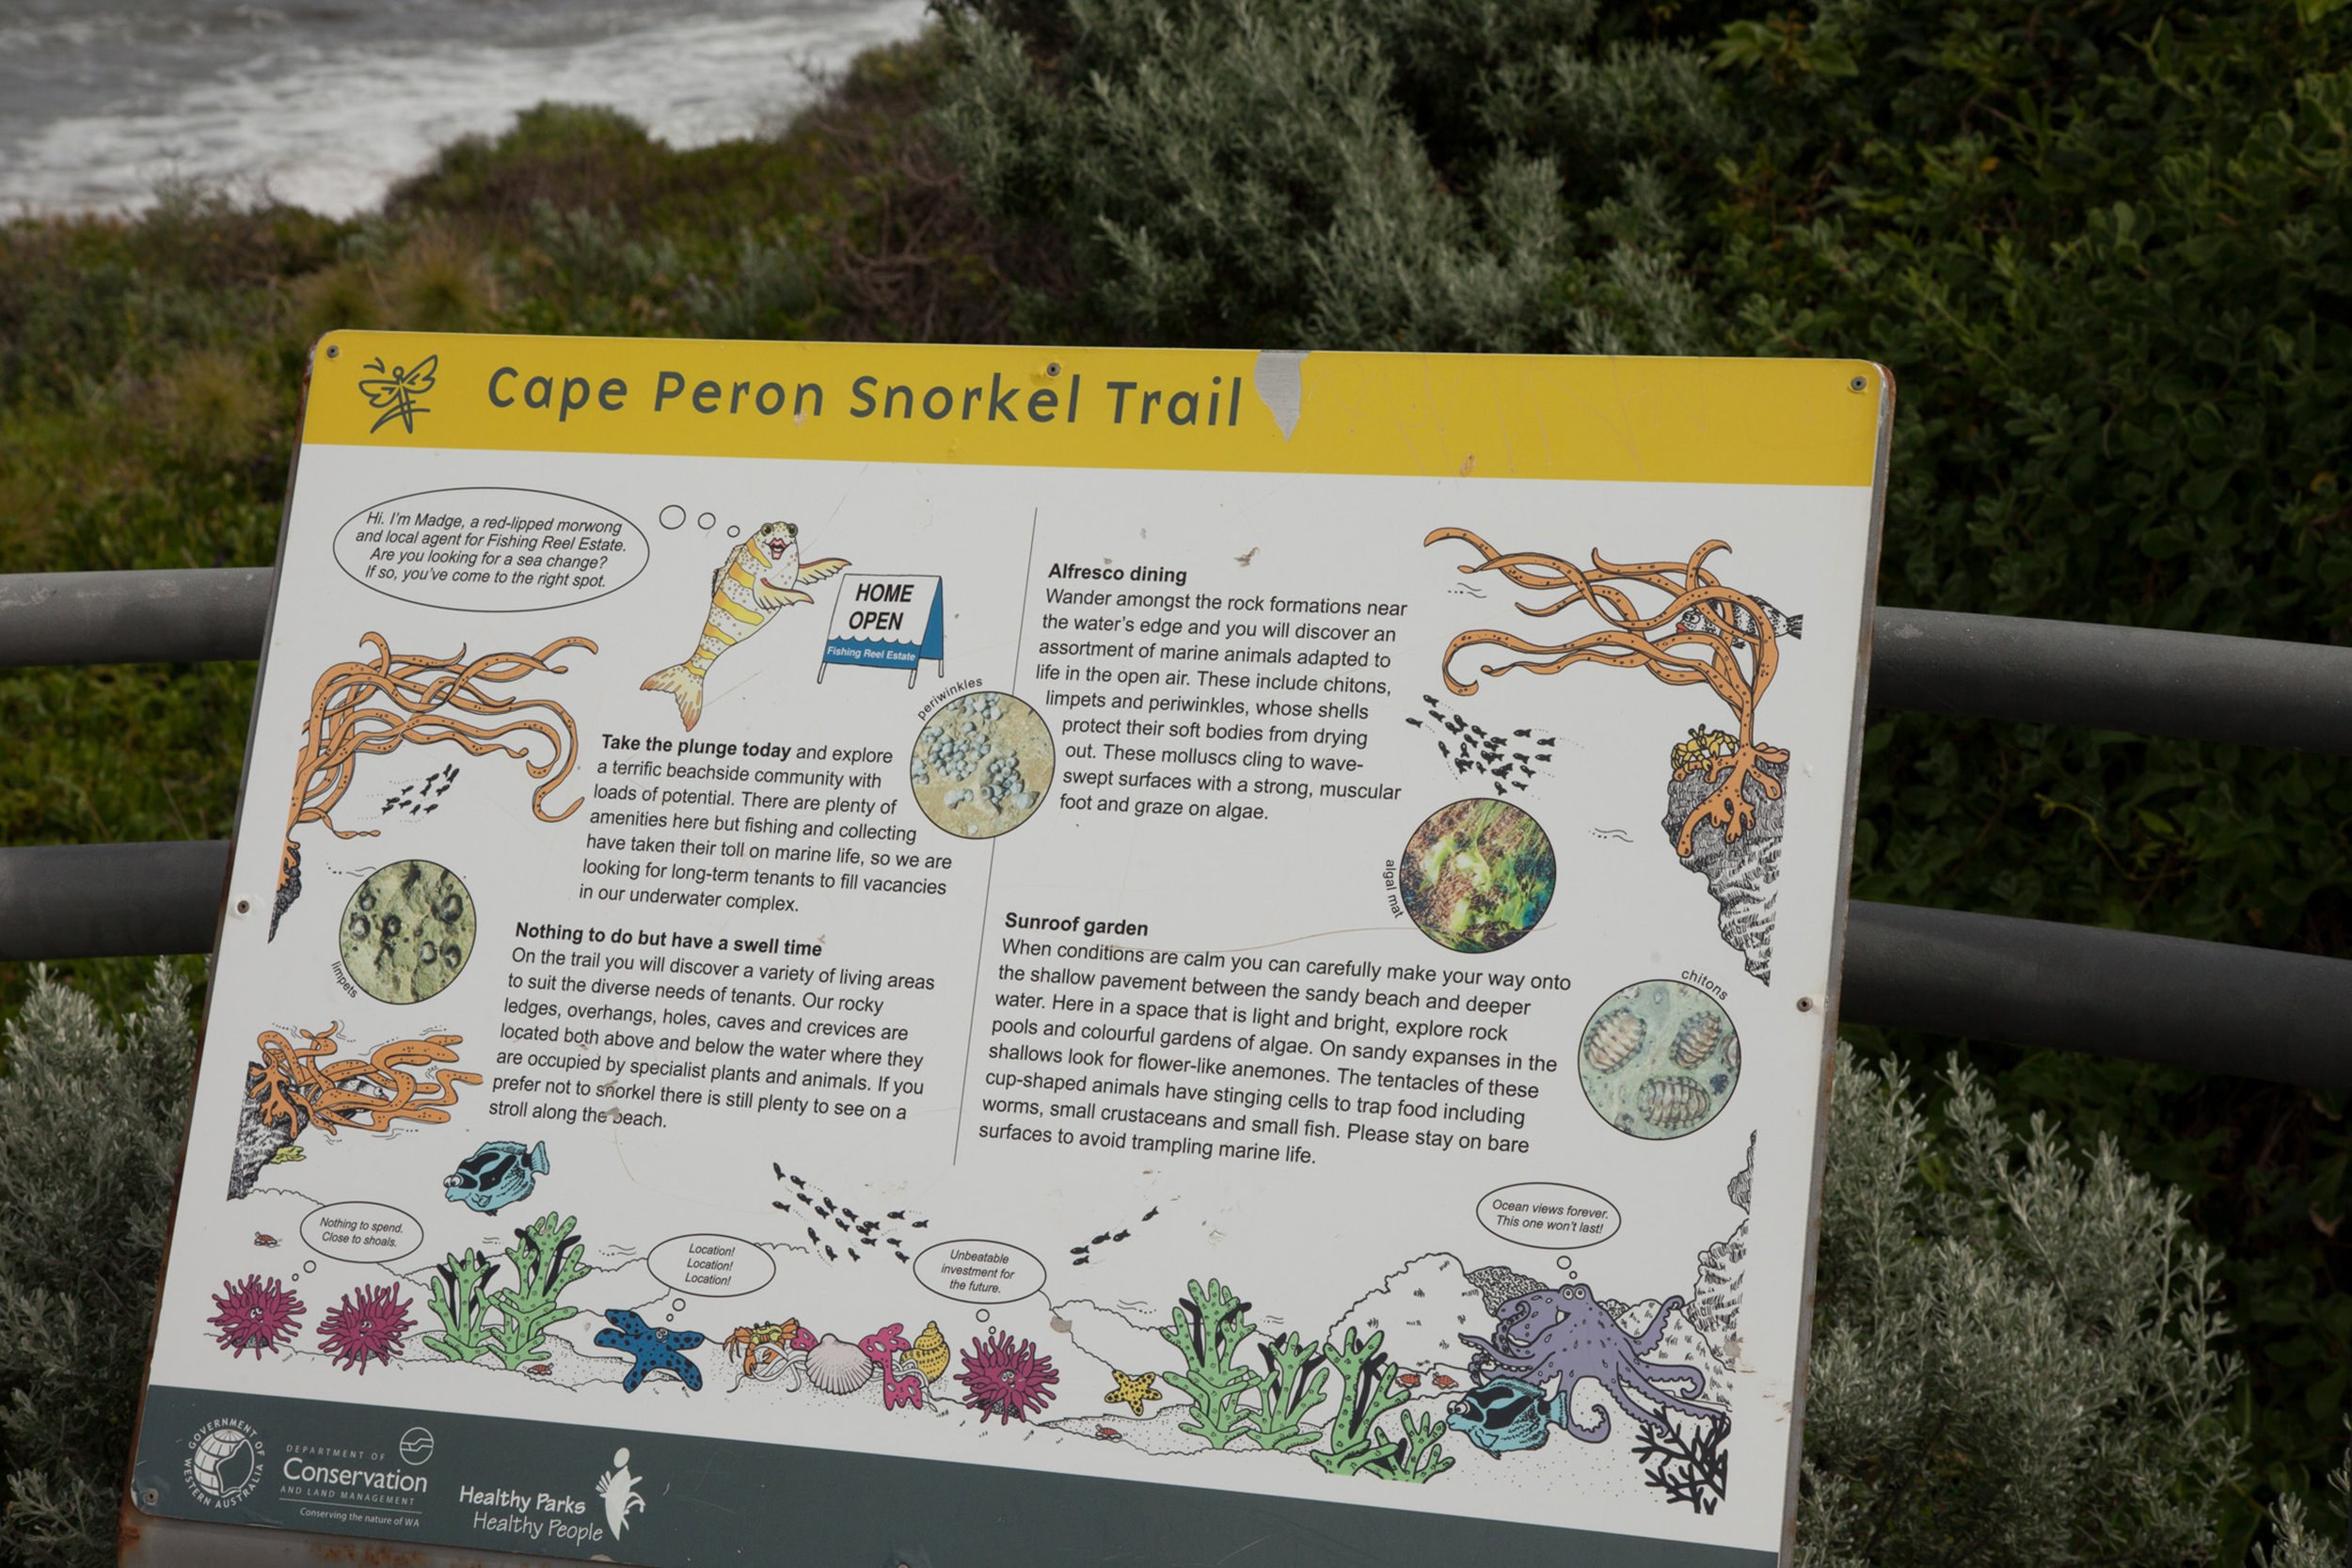
Plate 12: Information sign for Cape Peron Snorkel Trail
From this look out head back to the carpark and then down the track to the beach (Plate 10 above). The beach for first half of the walk shows signs of significant erosion (Plate 13).

Plate 13: Some of the erosion on the first section of the beach walk from Cape Peron towards Shoalwater
As can be seen, some of this beach walk would be tricky in a high tide. You can avoid the worst of the erosion by heading up to Cape Peron Road just near a small carpark (Plate 14) and then re-enter the beach through the Apex Holiday Centre (Plates 15 & 16). HOWEVER, this is not a pleasant detour given how busy Cape Peron Road is, so, if the tide is low, continue on the beach rather than do this detour.
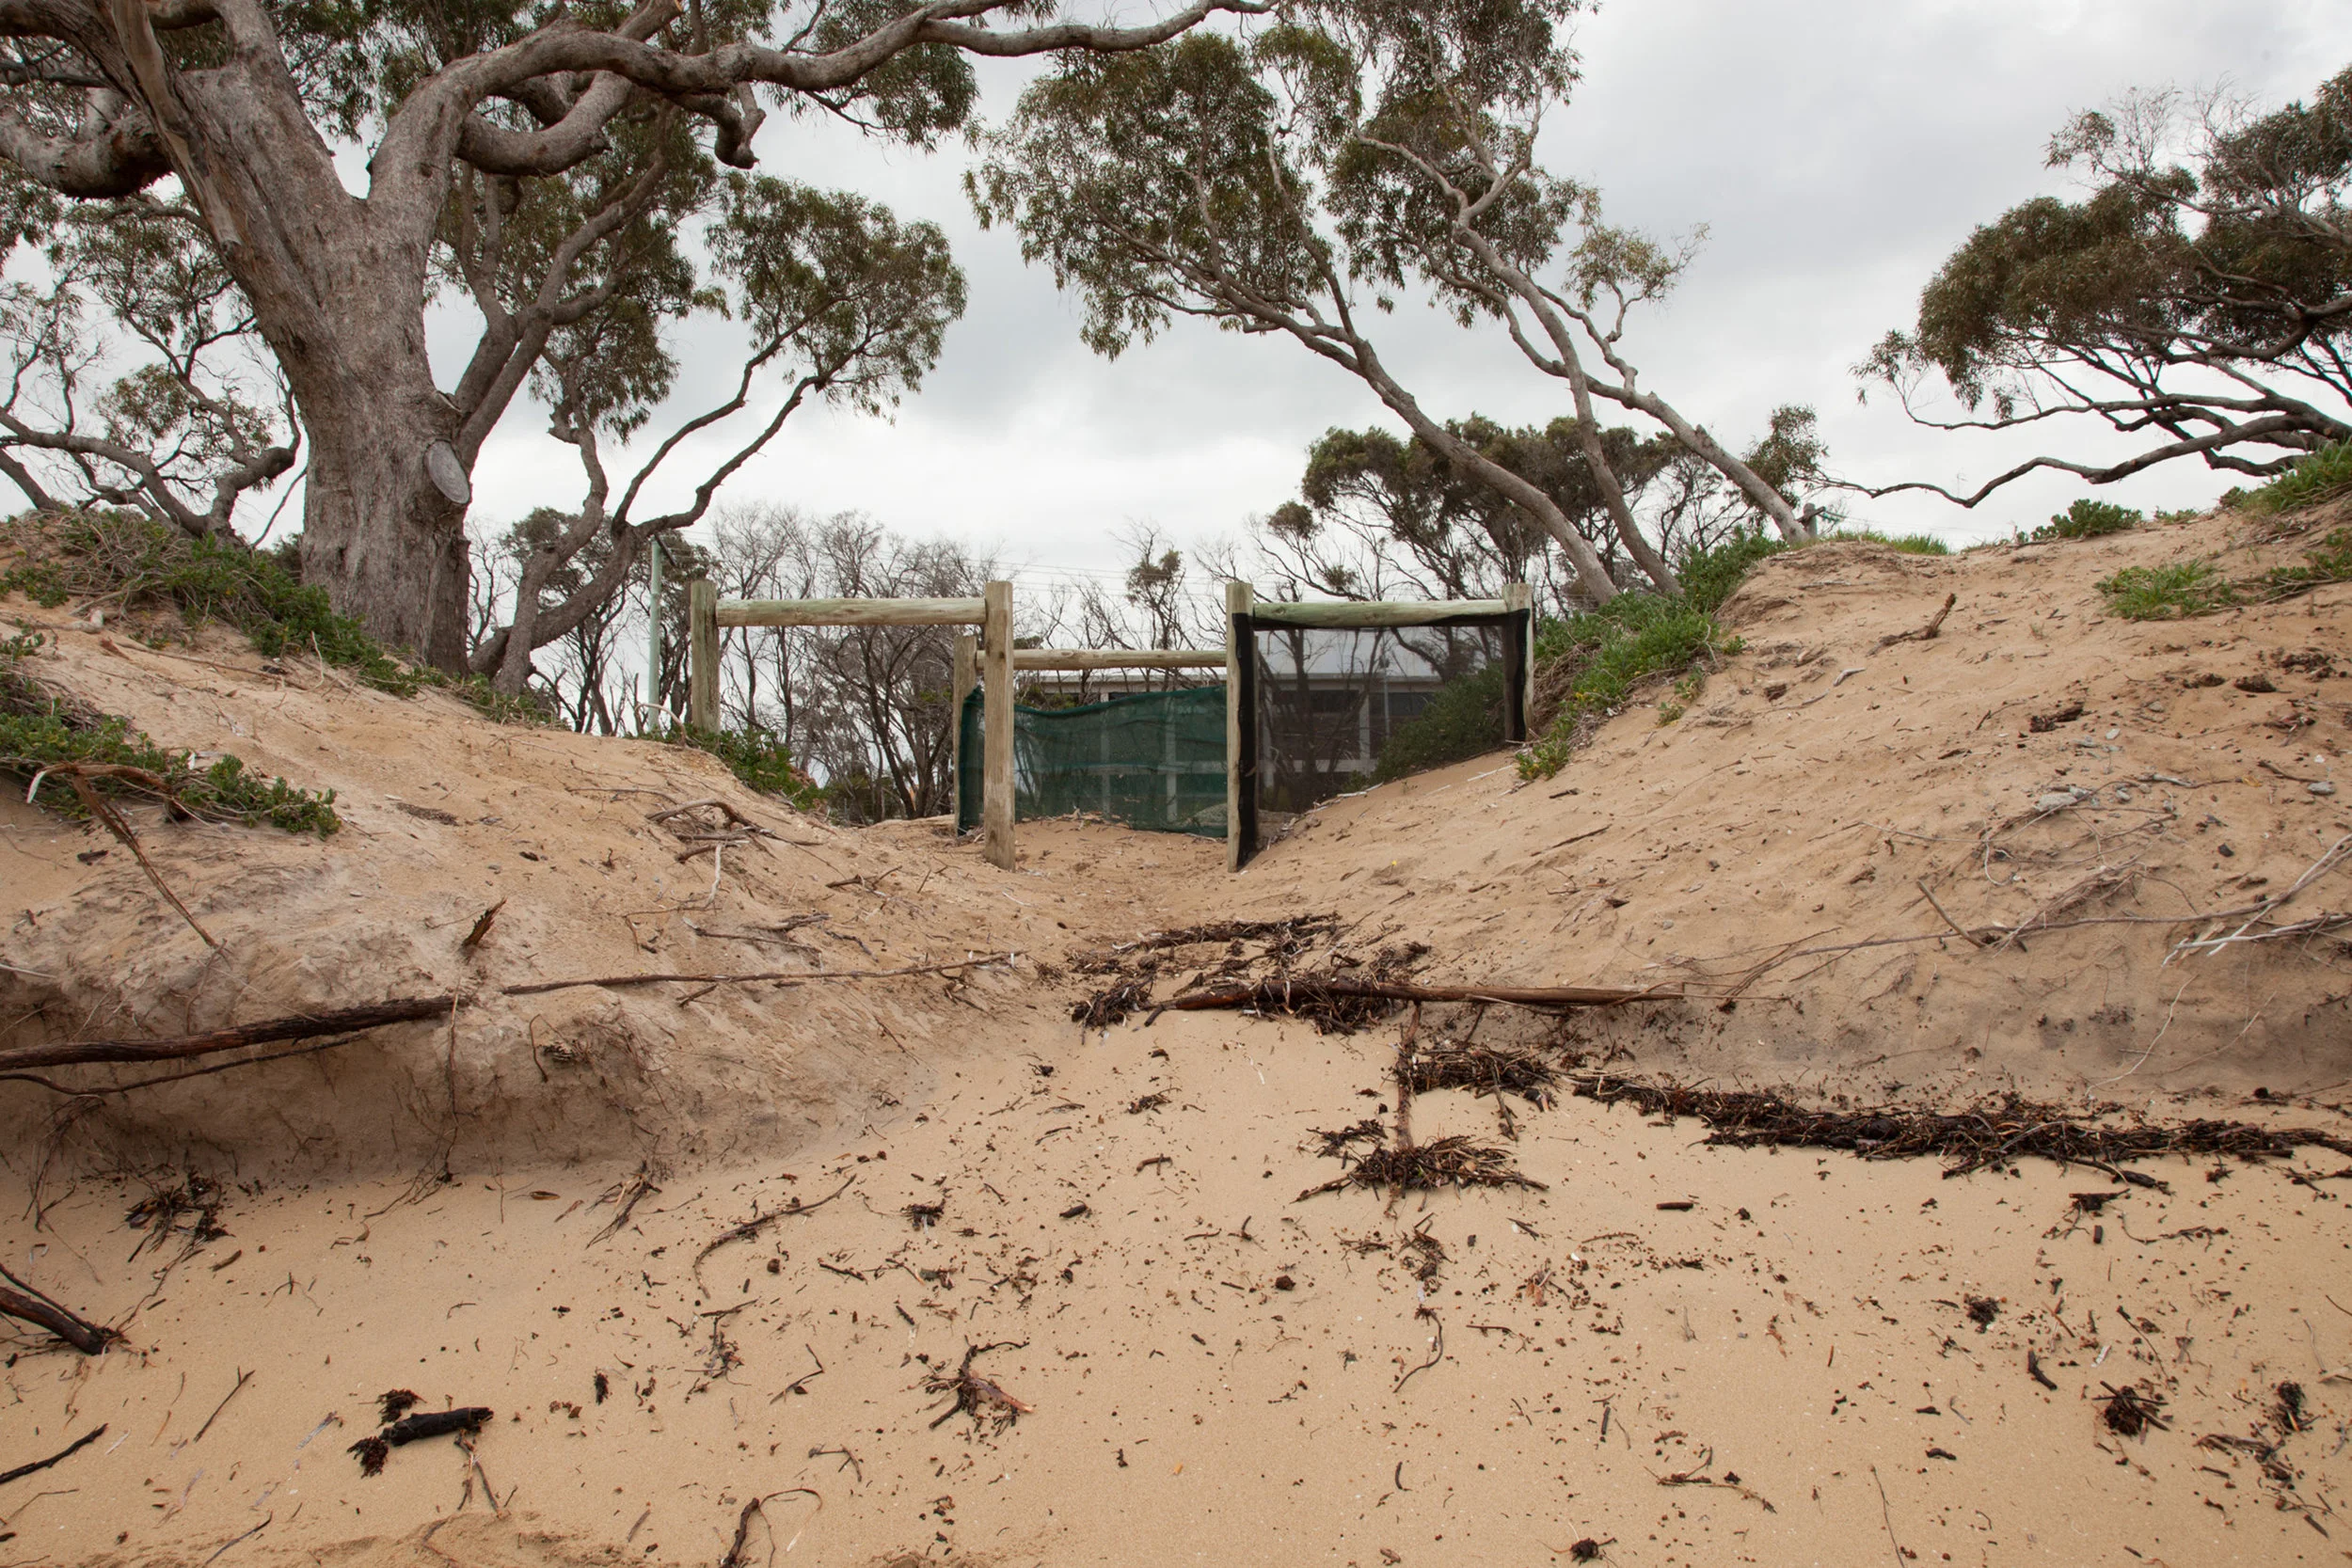
Plate 14: Best place to climb and leave the beach walk

Plate 15: Road into the Apex Holiday Centre

Plate 16: The Apex Holiday Centre
Between two shacks at the corner where the entry road ends there is a narrow sand track to the beach (Plate 17).

Plate 17: The sand track to the beach through Apex Holiday Centre
The remainder of the walk is straight forward as the beach to the south of the holiday parks is relatively stable (Plate 18).

Plate 18: The last section of the beach walk to Shoalwater
The turn around point was top of the first steps you come to at the end of the regional park (Plate 19). There is a seat here which gives nice views of Cape Peron and the off-shore islands (Plate 20).

Plate 19: The steps at the end of the Regional Park and the start of the Shoalwater residential area

Plate 20: Turn around point and views to Cape Peron
For the return leg, retrace your steps until you get to Cape Peron again after you leave the beach. At the end of the small track from the beach you will come to a T junction – take the track to the right that takes you to another carpark. Go through the carpark and take the path up to an old World War II armaments look-out (Plate 21). It was a steep climb but the views were spectacular (Plates 22 & 23).

Plate 21: Path and steps up to the old World War II armaments look-out

Plate 22: View from the old World War II armaments look-out.
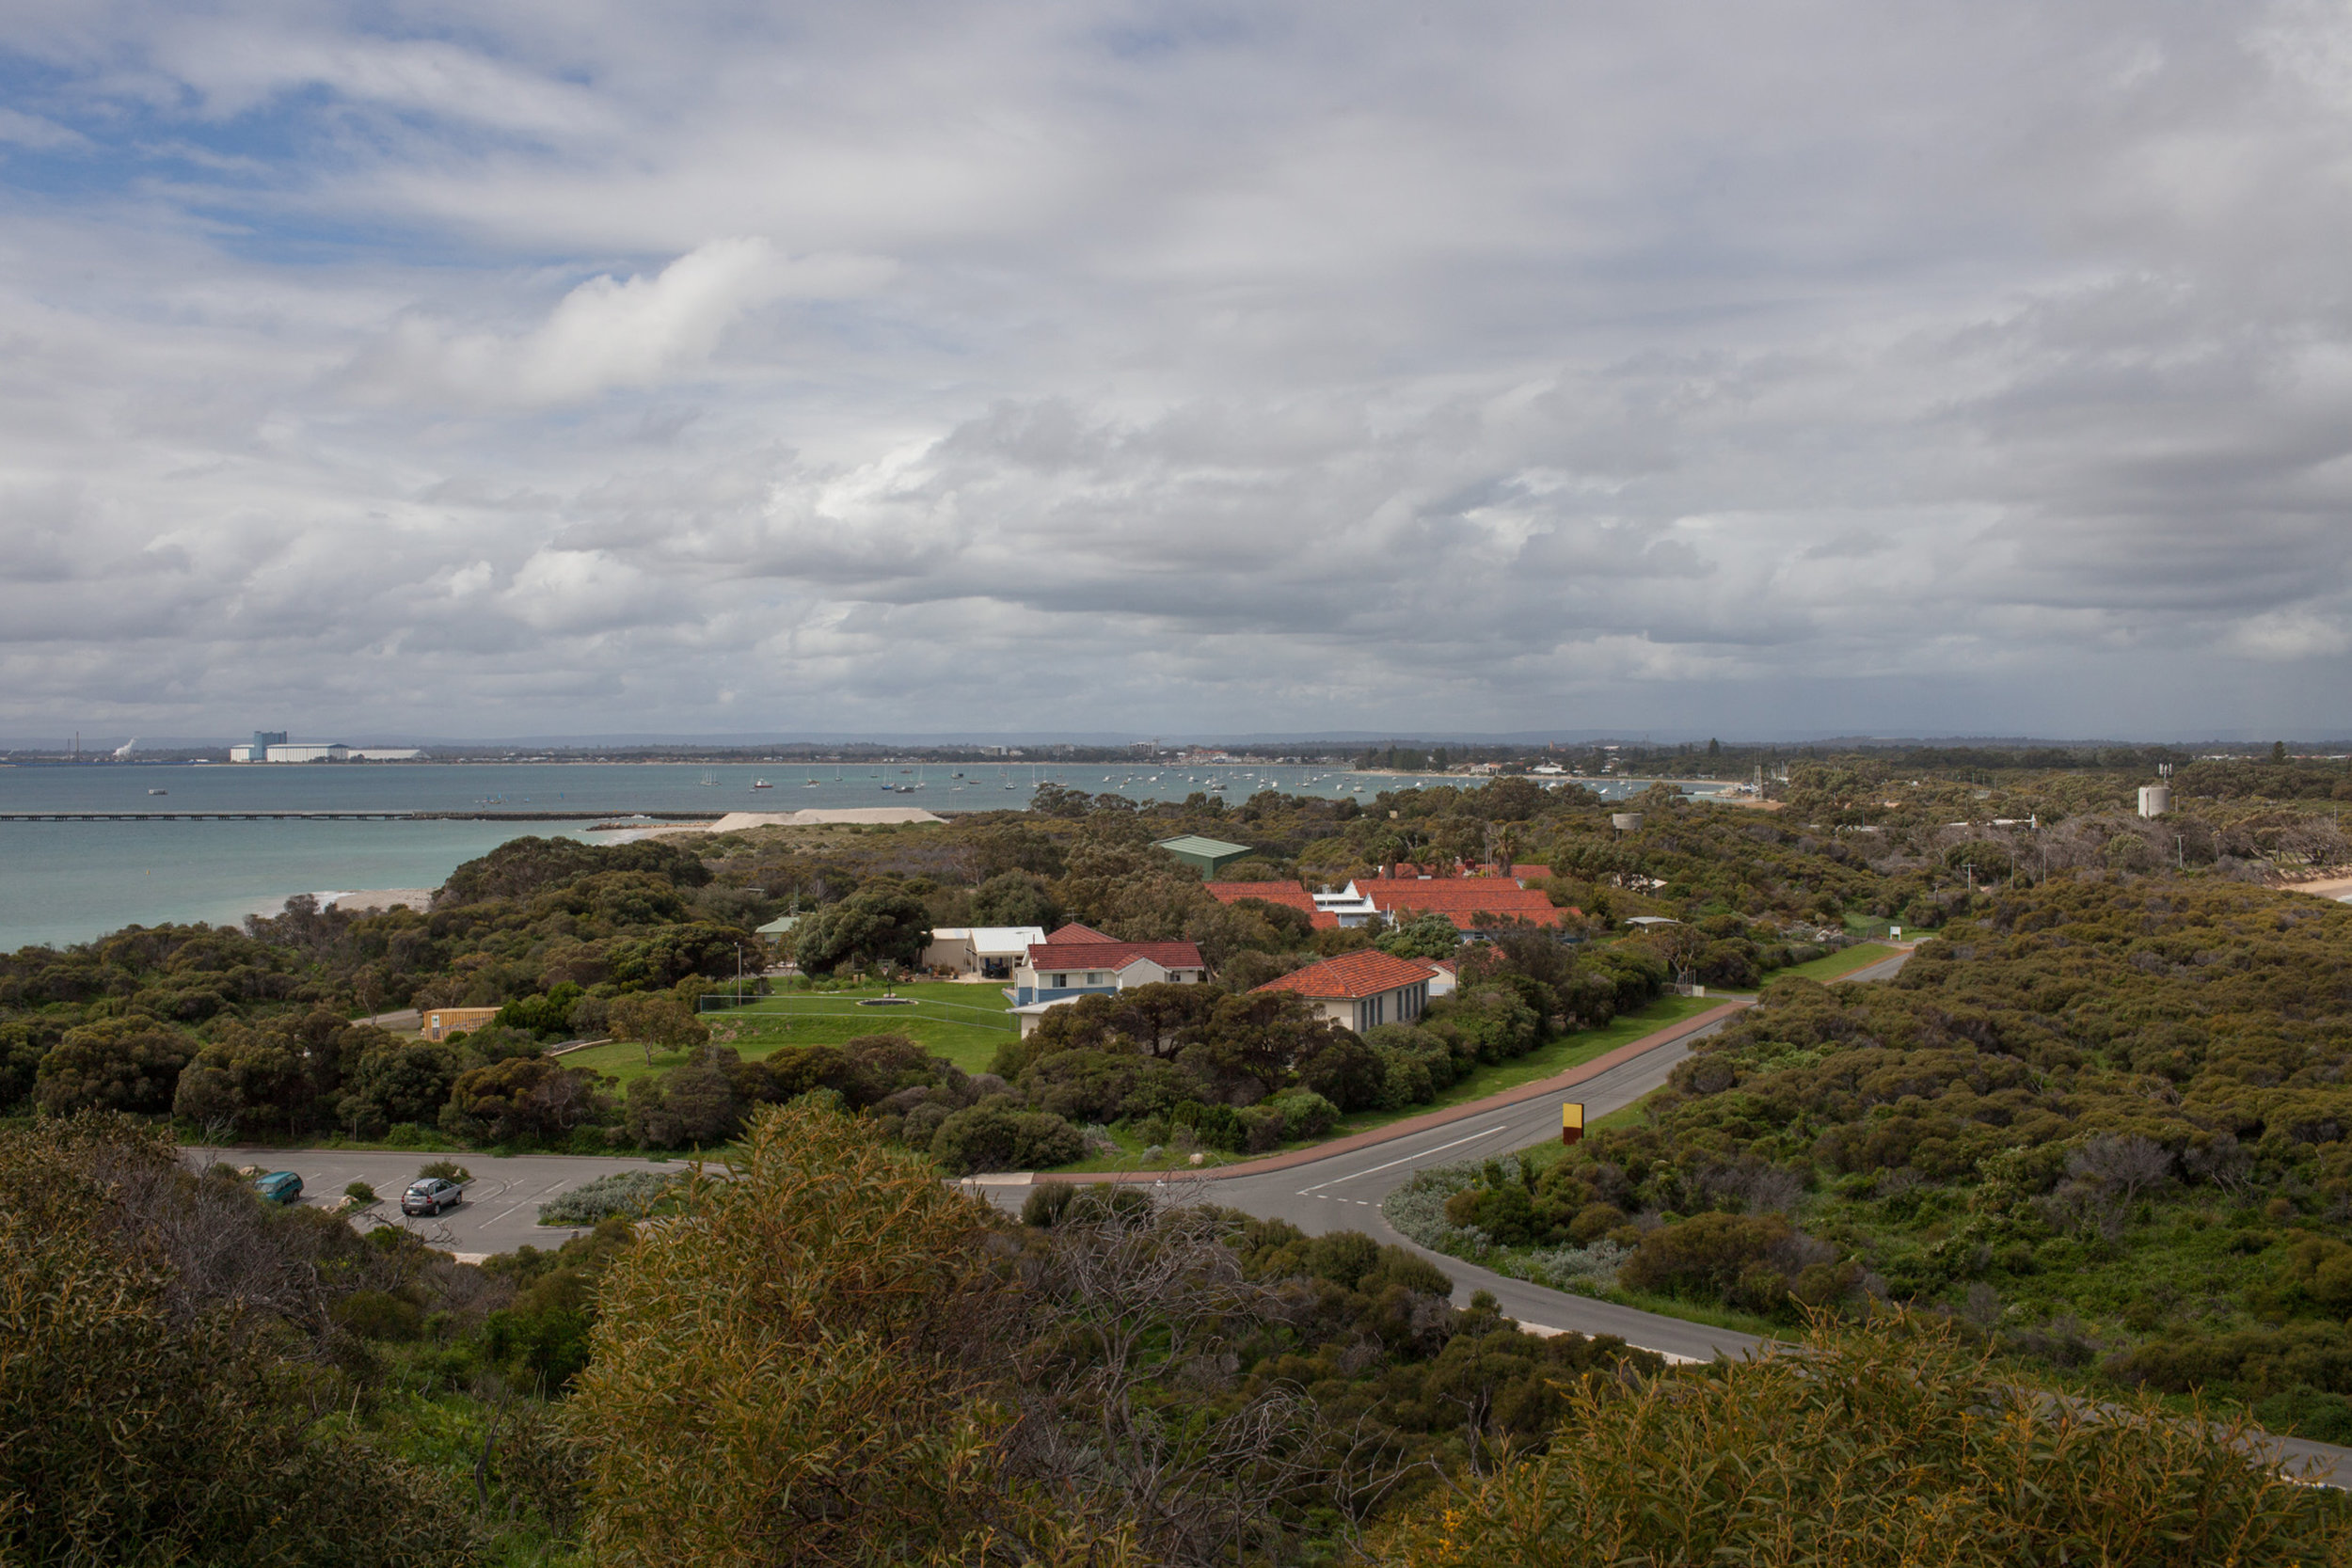
Plate 23: Another view from the old World War II armaments look-out
From here it is a short walk back to the carpark (head north) - visible in the bottom left of Plate 23.
Garry Middle, February 2026.